Pages

Showing posts with label recipe. Show all posts

Monday, February 9, 2015

Orange Cranberry Coconut Vegan Scones

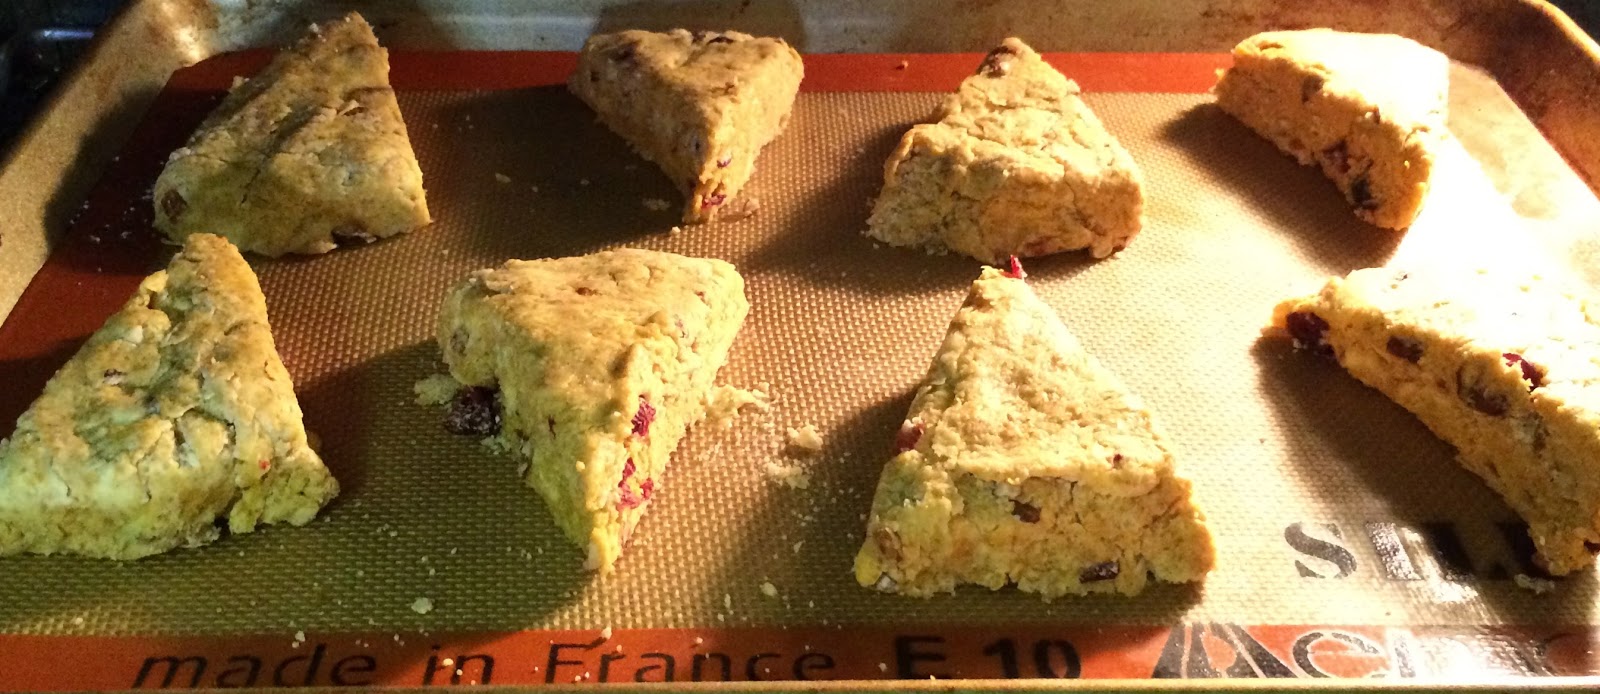
I love scones! Normally I make them with butter though, and cream/yogurt/kefir but one day I was out of butter, but scones HAD to be made. Seriously, they had to be haha. Anyways so these happened, and it's been a hit! Note to self, I have seriously got to take better pictures.

You'll need:
2 Cups flour (I use organic white unbleached)
1 tsp. baking powder
1/2 tsp. baking soda
1/2 tsp. salt
1/2 Cup Coconut Oil in solid form
zest of 1 good size orange, or 2 small ones.
The juice of those oranges, you will need 1/2 cup liquid, if I don't have enough orange juice add coconut rum to make it to 1/2 cup.
1/2 Cup cranberries (more or less to your preference, I never measure them just use a generous handful or so).

Preheat the oven to 400F degrees.

First mix all the dry ingredients, then zest the orange/s and mix it in.

Cut in the 1/2 cup of solid coconut oil, just like you would butter in a non-vegan recipe. 

Next stir in the cranberries, I like to separate mine out since they stick so badly, you can also just give them a rough chop. Then pour in the orange juice (with the coconut rum if you added it) and stir it together till well incorporated. Then I like to dump it onto a clean counter and lightly knead/fold/ push the dough together until it stays together, shape into a disc, no more than an inch thick. Slice that disc into 8 wedges. If you want small scones then separate the dough into 2 parts, shape into 2 discs and slice each one into 6 scones. I remembered the picture after I started transferring it to the cookie sheet, oops!


Bake for 20 minutes, check on them after 15 minutes if your oven is an overachiever. When they start to get nice golden brownish they are done! Wait for them to cool, a bit, or not, whatever works. And voila! Bon appetit :)

Thursday, October 2, 2014

Pumpkin scones recipe!

Funny thing, I never used to like pumpkin until about a year or two ago. Now I'm pretty open to it, and it does make me feel like fall is here. Because living in California you'd never know it's fall, it's been in the high 80's most of the week. So we try to make it feel like fall, through the crazy heat and what not.
We've been all about the scones lately so I made up a recipe and have been tweaking it for abut a week, I've made a batch almost every day, and to be honest they have all been good!

Ingredients: (this makes 8 scones)
2 Cups flour (I use white unbleached organic, but I should try it with whole wheat, or at least half/half)
1/4 C. brown sugar
1/4 tsp. salt
1 tsp. baking powder
1/2 tsp. baking soda
1/2 tsp. cinnamon (add more if you like your cinnamon, I'm sure pumpkin pie spice would work fine too)
1/4 tsp. all spice
1/4 tsp. ground cloves
1/2 C. butter (1 stick)
1/2 C. pureed pumpkin
1/4 C. heavy cream
toasted pecans and dried cranberries to taste, I do about a 2 TBSP each, eye ball it.
Preheat the oven to 400 degree F.

Combine all the dry ingredients and mix them well. Take the stick of butter straight from the fridge cut it into 1/2 inch cubes and add it to the dry ingredients. Cut into the flour mixture with a pastry knife. It will look like course crumbs when you are done.


Measure out 1/2 cup of pumping puree, I do this in a glass measuring cup and add the cream on top of it then stir together.

Add the pumpkin and cream mixture to the flour & butter mixture, stir with a spoon or fork, I like to use 2 forks and toss it together. You want to handle this dough as little as possible, it's a pretty dry dough so that's not necessarily easy. Once you've got it somewhat incorporated (it will not come together at this point, it'll still resemble course crumbs, just larger ones) add the nuts and the cranberries. Toss a few more times to mix those in.

At this point I dump the dough on the counter to finish it. Try not to knead it, I sort of fold it and squash it together until it forms a mass. Then I shape it into a circle about 1" thick.

I forgot to take a picture of it cut. But cut all the way across the circle through the middle to split it into 2, then make a cross cut to split it into 4, then cut each quarter into halves and you end up with 8 wedges. Bake for approximately 20 minutes, if your oven is an over achiever perhaps check on them after 15 minutes. Mine is rather slow so it takes the full 20, they should start to brown on top. Naturally I forgot to take a picture of the finished product, and there is non left haha. I will make them again in a day or 2 I'm sure and will add a picture. Here they are going in though:

I've been debating whether or not I should make a glaze for them. I might test drive them with a glaze next time I make some. If someone tries them with a glaze I'd love to know what kind and how you like it. Bon Appetite!

Tuesday, June 10, 2014

My deodorant recipe

I haven't used commercial deodorant in over 2 years. The carcinogenic list of ingredients is just not something I'm willing to put on my body. I've used several different recipes over the past 2 years and have used some natural store bought deodorants. Those didn't' work for me. The only store bought one that worked sort of was the Crystal deodorant. Not so well during the summer though, winters it did well enough that I used it primarily. It was especially great when I was pregnant and couldn't handle smells, since it is unscented.
So here is my recipe, this makes enough to fill 3 empty deodorant containers:
0.5 oz beeswax (I plan to experiment with adding more to make the mixture even more stable in warmer temperatures now that it's hot, but so far I know this amount works for this recipe.)
1/2 Cup coconut oil
2 Tablespoons bentonite clay
6 Tablespoons each baking soda and arrowroot powder.
10-15 drops of Tea Tree oil (depending on how you like/dislike the smell, but it's a great for its anti fungal and antimacrobial properties)
20-30 drops of whatever essential oils you want to scent it. I've been doing about 10 drops of lemon, 10 drops of Sweet Orange, and 10 drops of Lavender. I'm thinking of dropping lavender form this particular blend though and just doing more citrus.


First melt the beeswax either in a double boiler or over low heat.


When the beeswax is melted turn the heat off and add the coconut oil, stir until melted. Since coconut oils has very low melting point there is no neat to heat it, the heat of the beeswax and the pan should od the job quickly. Then I start stirring in the powders, bentonite clay goes in first. Then I add the baking soda and the arrowroot powder, 1 tablespoon at a time alternating them so it's easier to keep track of how much has gone in. When stirring the powders in you want to remove the pan from the heated burner if you have an electrical that stays warm for a while, like mine. I use chop sticks to stir the mixture. It ends up being about the thickness of kefir, maybe a tiny bit thicker. Once the powders are stirred in add the essential oils and stir them in.

Then I let the mixture sit for about 5 minutes, I want it to cool just a bit before I pour it into the deodorant containers. I fill the containers and put them in the fridge to set up and usually end up leaving them there over night, till the next morning when I need them. This whole process takes me maybe 10 minutes, it's pretty easy and simple and very customizable. If someone tries this I'd love to hear if it works for you.

Thursday, June 5, 2014

Grandma's buttermilk sourdough pancakes

I wish a had a picture of the pancakes my grandma used to make. She lived in a village with barely any electricity, and no running water or sewer system. The water was taken from a well in the yard, and the bathroom was an outhouse behind the barn. It was "rough"living, at least my mom recalls it being rough growing up there. I can certainly see how it probably was. But for kids it was glorious! We visited for a few weeks every summer in childhood until grandma passed away, around the time I was 10. Grandma did have a tiny fridge, and a gas stove but rarely used those. She mostly used her giant brick oven. In this brick oven she cooked the best pancakes I have ever tasted! She used to make them big too, probably 9"-10" we'd put one on the soup bowl and put a generous pad of butter in the center then run it all around till it melted and created a puddle of melted butter in the center. Then we'd tear off chunk of this delicious pancake dip them in the butter and enjoy. I so wish I had a picture of that.

For years my mom and her sisters tried to replicate the recipe, no one had it or thought to get it form Grandma before she passed. No one ever got even close! They all wrote it off on the lack of the big brick oven. Alas I think the problem was they didn't use sourdough starter. I started using sourdough starter 2 years ago and just randomly my mom mentioned that grandma used to have some bubbly mixture she kept going that she kept on a shelf in the brick oven, and she added this bubbly mixture to the pancakes. I figured it had to have been sourdough, test drove a recipe and what do you know, it tastes like grandma's pancakes!

The recipe I've come up with is rather basic, no eggs or oil/butter involved which works out great for those days when I'm low on ingredients. This batch is quite large but these freeze well and reheat well in the toaster. Anyways here it goes!

2 cups sourdough starter straight out of the fridge
2 cups buttermilk
2 cups flour
1.5 Tsp baking soda
1 Tsp. salt
3Tbsp. sugar (more if you like your pancakes sweet, I prefer mind pretty neutral)
Mix sourdough, buttermilk, sugar, salt and baking soda together. Stir in the flour and let the batter rest for at least 20 mins.


I cook them on cast iron over low heat, but proceed as you normal would with any other pancake. Enjoy!

Thursday, November 21, 2013

Buttermilk Pancakes Recipe

Please don't use the pre made box mix! It's so easy to make them from scratch, and just as fast (maybe just a few minutes more) but well worth the effort!
What you'll need, 1 batch probably feeds 3-4 people (adults or children that eat well) I made 2 batches here and it was way too much:
2 Cups buttermilk
1 egg
1.5 Cups flour
Flax meal is optional, I add a few tablespoonfuls.
1 tsp. baking soda
1/2 tsp. salt
2-4 Tbsp sugar, adjust to your preference.
2Tbsp melted butter

Mix the egg and the buttermilk until the egg is incorporated. If you using flax seed meal add it now, and  add the sugar.

Melt the butter and stir it into the wet ingredients.
In a separate bowl mix the flour, salt and baking soda well.

Add dry ingredients to the wet and stir just enough to combine. Small lumps are perfectly fine.

Cook over medium/low heat, make sure to preheat your non-stick griddle or skillet well first. I generally don't grease it, but occasionally will put a small piece of butter on the skillet, just for the first pancake.

Enjoy with some butter and maple syrup, at least that's how we like them.

Bon Appetit!

Sunday, October 13, 2013

Steamed artichokes with a garlic/lemon butter dip, and a how to eat them guide.


I've always been intimidated by artichokes until I got some in our weekly farm box, they were here I didn't want to waste them so I looked up how to make them and gave it a shot. I remember we were so skeptical about them that we didn't even sit down, we just stood at the kitchen counter and ate them dipping them in plain melted butter. To our surprise we thoroughly enjoyed them and they were actually quite filling and hearty.
Without further ado, you'll need some artichokes, we usually do 4. So for 4 artichokes I usually use 4TBSP of butter melted, 2-3 cloves of garlic and juice of half a lemon.

Wash your artichokes
 photo IMG_2824_zps601667bc.jpg

Trim them, cut the stem at the base and tear off the few leaves off the bottom, just the ones that are practically falling off anyways. Cut about 1.5" off the top.
 photo IMG_2825_zps3a7d959c.jpg

If the petals/leaves are prickly then take some kitchen shears and trim them all
 photo IMG_2827_zps354e3fe3.jpg

Put about an inch of water into a cooking pot and put your prepped artichokes in there, you can salt the water a bit but it isn't really necessary. Also they will start to go dark as soon as you cut them so if you are serving it up for company and want to keep them a vibrant green then put a slice of lemon over the top of each artichoke where you cut it. I don't usually do that because I'm too lazy.
 photo IMG_2828_zpsd2b199c8.jpg

Bring to a boil reduce heat cover and steam for about 30minutes
 photo IMG_2830_zps8fee122b.jpg

After about 30 minutes check them, gently tug at one of the petals and if it comes off easily then they are ready, if it's not wanting to come off then let them cook longer, make sure your water isn't cooked out so they don't burn.
 photo IMG_2831_zps588fd1f0.jpg

While they cook prep the dip, melt your butter then while it's still hot grate the garlic into it and whisk it in well, squeeze half a lemon into the butter as well. I add olive oil, probably because that just makes it seem slightly healthier, you can do that as well or you can let the dip be just butter.
 photo IMG_2832_zpsf9997d35.jpg

If adding olive oil, add in a small stream while whisking
 photo IMG_2833_zpseecf6e32.jpg

Pour the dip into individual dipping bowls and serve up on a big plate (need space for the waste) with the artichoke.
 photo IMG_2834_zpsbee428c1.jpg

If you've never eaten one before, you tear off the leaves one at a time, dip them in the butter mixture, and then at the bottom of the leaf is where the meat is, scrape it off with your teeth.
 photo IMG_2836_zpsc722f572.jpg

Do that with all the meaty leaves, when they get really thin I usually pull them out in a bunch and just dip and eat the bottom tips. Once you've processed all the leaves you get to the center, that's the choke of your artichoke. That hairy part is not edible
 photo IMG_2837_zpse5299a8b.jpg

Luckily it comes off easily (the hairy stuff that is) just scrape it off with a spoon or a fork.
 photo IMG_2838_zpsaff07541.jpg

You'll be left with the base of the flower, known as the heart. It's delicious! you can eat the whole thing, the artichoke heart that is.
Found this nifty little diagram, just a bit of a guide. Enjoy!
http://gardenofeaden.blogspot.com/2010/06/which-part-of-artichoke-do-you-eat.html

Monday, August 12, 2013

Simple sourdough bread recipe

This is the basic bread I make at least once a week, it's nothing fancy, but it's great for sandwiches, grilled cheese, or just to smear it with butter. You want to your start to be well fed and bubbly for this, not straight out of the fridge, that won't work. Plan ahead because this process takes most day, or do the first long rise over night and bake in the morning.

What you will nee:
1 cup bubbly starter
1.5 cups water
1.5 teaspoon salt
1 Tbsp. honey
1/4-1/2 cup flax seed meal
4-5 cups of flour, I usually use about 2 cups wholewheat and the rest white. You can use any of your favorite flours and any combos.

In a large bowl combine your starter, water, honey and salt. Stir it up well and add the flax seed.
 photo IMG_1058_zps8ff6624c.jpg

If your honey has solidified then first dilute it in the water
 photo IMG_1059_zps9f69b105.jpg

all combined
 photo IMG_1062_zpsca8a2040.jpg

Now start adding your flour, I usually add the whole wheat first, and then start adding the white. If you only do whole wheat your bread will come out pretty dense but still delicious. Once it's too thick to stir dump it out on the counter and knead by hand.
 photo IMG_1063_zps2d43455c.jpg

Good project to get the older kids involved, Penni loves it and she is 4.5
 photo IMG_1461_zpsa442feaf.jpg

I start off kneading in the bowl and then dump out on the counter, total kneading 10-20 mins. You want the dough to be not sticky, but not too dense. The lighter the dough the more fluffy your bread will turn out, but for sandwich bread I prefer it on the denser side. I eye ball it, and also depends if the baby is crying, if I have less time then the bread ends up being lighter fluffier.
 photo IMG_1464_zpsf64cc216.jpg

Lightly oil the bowl, form the dough into a ball roll it around in the bowl, so that it's oiled on all sides, cover with a towel and let rise until at least doubled in size, more is fine. On a warm day this can go as fast as 6 hours, on colder days it can take up to 10. I told you plan for this to take the whole day. Letting it rise over night is great if you can bake in the morning, keep in mind it'll need a second rise (much shorter one) so it's not something you can do beforee leaving to work, it'll still take some time.
 photo IMG_1065_zpsf2359149.jpg

After it's doubled in size, took about 8 hours on this day. Some days it'll be exploding out of the bowl and that's fine too.
 photo IMG_1490_zps886c62c3.jpg

I use a plastic wicker looking basket for the last rise, drape it with a towel and sprinkle with wheat bran to prevent sticking. I've also used corn meal and that worked fine too.
 photo IMG_1492_zps22a6e37f.jpg

Knead the dough for just a minute or 2, you want to make sure that the oil is thoroughly kneaded through or it will make your bread have cracks inside. Sprinkle with wheat bread on top as well.
 photo IMG_1494_zpsb33f51d3.jpg

Let it rise for 2-4 hours, about double in size, you don't really want it to get too big, if it's not quite double in size that's fine.
 photo IMG_1502_zpse6cd6fc1.jpg

Preheat your oven with your bread baker, you can use a cast iron pot with a lid. I have a clay chicken baker that I use and it works fabulously. Preheat the oven at 450 degrees for 30 mins, with the bread baker inside. Once it's preheated for at least 30 mins dump the dough in, shake it into place if needed, cover and bake for at least 30 mins, if your loaf is pretty large bake for 40 mins. This one went in for 30 mins.
 photo IMG_1504_zps1892467f.jpg

After 30 mins take off the lid and bake for another 15 mins.
 photo IMG_1505_zps079aa490.jpg

Dump out on the cooling rack and wait at least an hour (or until the crust isn't brick hard and isn't too hot to the touch) and enjoy!
 photo IMG_1507_zpse535c957.jpg